one thing is what you do… and you do it well.

Flashback to 2013 — I picked up a Synology NAS and, honestly, it was rock solid. Fast-forward over twelve years later, and while Synology still had my respect (no issues, super stable), I felt like it was time for a change. Not because it failed me — but because I wanted something a little more focused.

Here’s the thing: Synology does a lot. It’s got apps, media servers, Docker, file syncing, you name it. But me? I used it for one job — storage. That’s it. No Docker containers. No Plex. No fancy iSCSI mounts or NFS shares. I just wanted fast, reliable storage with a 10 Gbps port — and none of the extra fluff.

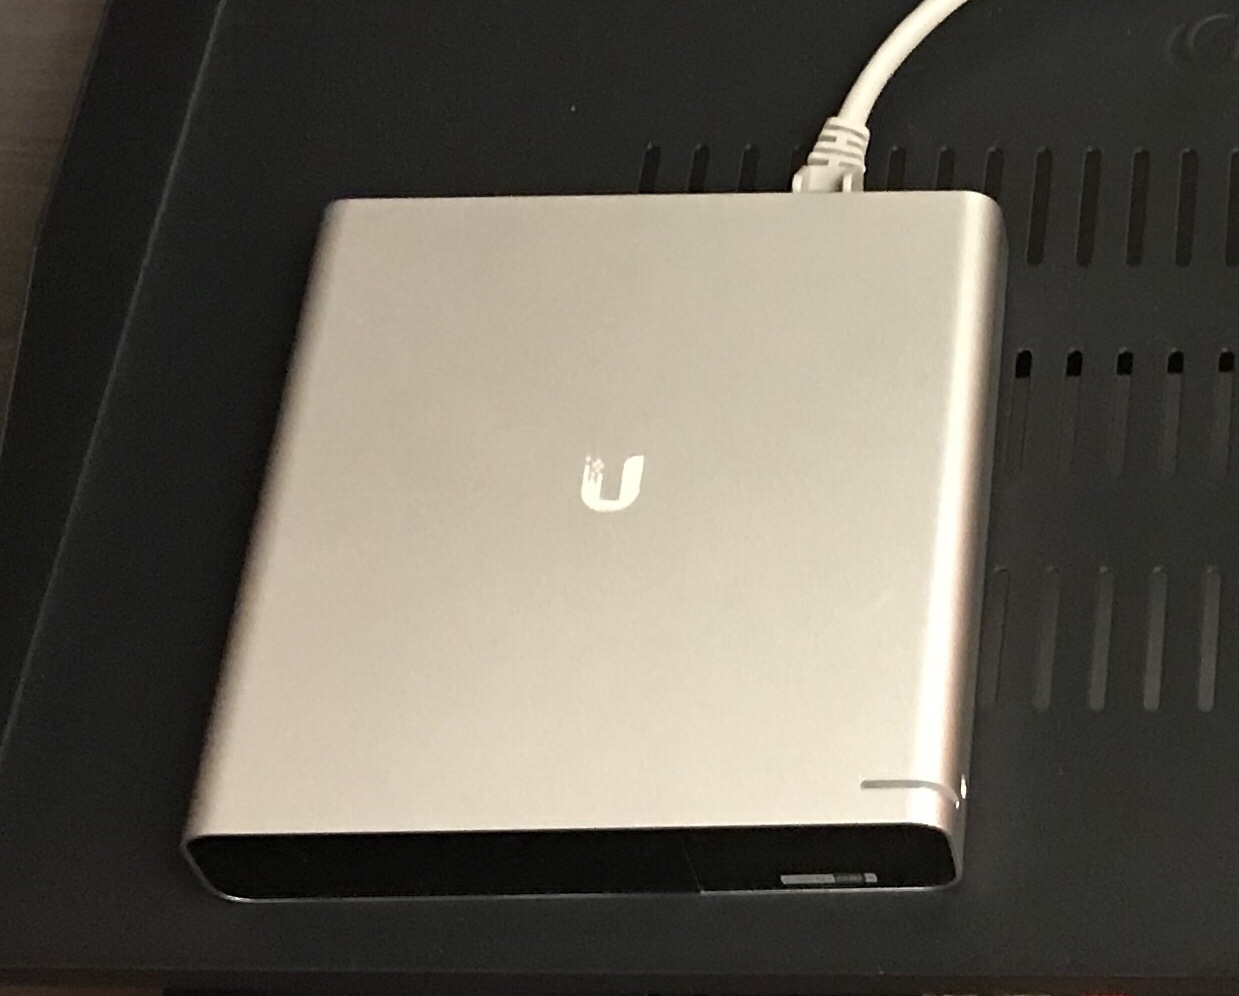
So I started looking around. That’s when I came across the Ubiquiti UNAS Pro — a slick little 2U, seven-bay NAS that’s been out for about a year now. After bingeing 40+ hours of YouTube reviews (yes, really), I thought: Let’s do this.

And wow — it nailed it.
Storage? Check
Speed? Check
Setup time? Maybe 10 minutes.
Dashboard? The classic Ubiquiti interface I already knew and loved.

If you’re already living in the Ubiquiti ecosystem, adding the UNAS Pro is a breeze. And if not, you can still run it standalone — but trust me, life’s just easier if you fold it into a Dashboard Site. You get better control, smoother configuration, and everything in one clean view.

So, if you’re like me — and just want your storage to be storage (no extras, no distractions) — this thing is a dream. Don’t expect it to run your media empire(hmm) or spin up VMs — that’s not what it’s for. It’s built for one job, and it does that job really well.

Bottom line?
UNAS Pro is simple, fast, and focused.
And in my opinion?
….. Absolutely perfect.

Amber and green or green and green are no longer a thing.

When I first heard about Etherlighting™ (a few months ago), my reaction was, “Hmm… okay, but why?”

For decades, we’ve had the same two little LEDs on switch ports—amber and green, or sometimes just green and green. This has been the standard for as long as I can remember—and that’s going back quite a few years. So, why change it?

Let’s think about what we’ve had until now. One LED typically indicates link status, while the other shows port speed. For example, amber might signal 100 Mbps, and green would indicate 1 Gbps. Some switches would use only green for gigabit speeds, and show nothing for lower speeds. You get the idea—but every vendor implemented this slightly differently.

Essentially, those little LEDs showed just three states. They’d blink like crazy to show traffic. And that was fine. Functional—but boring.

Then someone came along and changed it.

I kept asking myself: Why? Why mess with this?

Then it hit me: Damn, I wish this switch had Etherlighting™.

Let me explain Etherlighting™ in my own terms:
Take those two little blinking lights and toss them. Replace them with an RGB LED. That single LED can now represent virtually any color. Let’s say violet for 100 Mbps, and red for 10 Gbps. Suddenly, link status becomes instantly useful and visible. Not only to show link speed, but even VLAN assignments, blue for VLAN 20, or Green for VLAN 40(you see where this is going).

So why did I want a switch with Etherlighting™? Simple. Imagine trying to find and remove a cable on a crowded switch. You squint at tiny port numbers and risk pulling the wrong one. With Etherlighting™, you can highlight the exact port. One command, and that single port lights up clearly. No guessing. No mistakes. Now picture that across five 48-port switches in a rack. Yeah, it makes a difference.

As of now, Etherlighting™ is unique to Ubiquiti. I believe (and hope) they’ll eventually roll it out across their entire switch lineup as models get refreshed.

Now, some might say, “But the cable boot blocks the LEDs anyway.” True—if you’re using those old snagless designs that haven’t evolved in decades. Ubiquiti’s patch cables, however, have frosted/clear jacks that allow the LEDs to shine through the connector—and honestly, it looks cool. TrueCable offers something similar too (personally, I like their black patch cables).

To me, this is the evolution of the switch port. Now, when I look at a switch, those LEDs mean something. They provide actual value. Sure, it might only save a few seconds here and there. But time is the one thing you can’t get back. And if Ubiquiti is trying to give me a little more of it, I’ll take it.

Makes me wonder—what else is Ubiquiti doing to save me time?

one click buy is the new enterprise

I have been reflecting on these thoughts for the past year, ever since Ubiquiti hosted its UniFi World Conference in 2024. Initially, these reflections amounted to ten pages of unstructured ideas, but I finally took the time to distill them into a central theme: Enterprise.

Looking back over the past five years and projecting forward to the next five or ten, I question whether the concept of “Enterprise” as we know it today will remain the same. The answer, in my view, is no—it will inevitably evolve.

Ubiquiti appears to be embracing a direction that many companies are slow to recognize or adopt. The traditional model of engaging value-added resellers (VARs) or intermediary vendors to accomplish tasks may no longer be necessary. Instead, organizations need skilled professionals who are empowered with business process expertise—individuals who can drive initiatives forward without unnecessary layers of bureaucracy. Businesses are increasingly shifting toward leaner, highly capable teams that can adapt and optimize networks independently.

A prime example of this shift is Ubiquiti’s online store. Consider the traditional process of purchasing enterprise equipment from industry giants (e.g., “Big Green” and “Orange”). It typically involves multiple interactions with sales representatives, engineers, and distributors—only to later discover that the product is out of stock, requiring further adjustments. Contrast this with the seamless experience of ordering from an online store like Amazon Business, where business-critical hardware can be delivered in two days or less. This efficiency empowers teams to drive change and improvement within their organizations without unnecessary delays.

At the conference, the term Enterprise emerged as a central theme. However, I have always found the term ambiguous, as its meaning varies widely. Some define it as supporting specific systems or navigating complex sales channels. But why? In many cases, the justification seems to be “because that’s how it has always been done.”

This mindset is problematic. Technology evolves rapidly, and what was considered best practice six months ago may already be outdated. The industry must be willing to adapt now, rather than clinging to legacy approaches.

Ten months is a long time in the tech world, and significant advancements have been made. Previously, I would have said that Ubiquiti had an “Enterprise problem”, but now, I believe the real challenge is one of scale. However, recent product releases and announcements have begun to dismantle those previous concerns.

The key question is: Have you tried it?

I am not suggesting that Ubiquiti is a universal fit for every enterprise use case. But as with any technology provider, a holistic implementation is necessary to truly evaluate its capabilities. Deploying a single component in isolation rarely offers a comprehensive understanding of a system’s potential. This is precisely why empowered, skilled teams are essential for driving network innovation.

Ubiquiti’s approach to enterprise networking is not just about today or tomorrow—it is positioning itself for the future. And to me, that strategic foresight makes all the difference.

As organizations continue to evolve, so will their applications and internal processes, enabling agile teams to execute with confidence. Perhaps in the near future, Ubiquiti’s online store will introduce an API for seamless integration with billing systems—a development that could further streamline operations.

The future of enterprise networking is shifting, and companies must be ready to adapt.

Hey, Gen 2 is cooler!

Looks like Gen 2 is out … uhm, wait? What’s a Gen 2? Ah…. Yeah lets talk a little about it.

Ubiquiti Networks released for Early Access, Generation Two of their Cloud Key controller. This time in two flavors, Normal and Plus. Lets talk about the Plus first. The CK Plus model is small, light and comes enclosed in an aluminum shell. The CK Plus is roughly 1.5 inches in height, just under 1U, and roughly 5 x 5 inches. Cool. And, has a nice little display that shows information about cameras and how many clients are currently connected.

Hold on a second, you said cameras, yes – I did! The Plus model also acts as an update to their Network Video Recorder. Which has been updated and is now called UniFi Protect.

(Currently UniFi Protect only runs on the CK Plus — I think that has changed?? Check the UBNT Forums)

And — both models are PoE powered. “Powered by 802.3af PoE or QC 2.0 USB-C”

Note — both the Normal and Plus models have a built-in battery for automatic safe shutdown. Nice!!!

The Video Recorder, oops, the CK Plus, comes with a 1 TB 2.5 Inch Hard Drive, which can be “user” upgraded to 5 TB.

So now you have your Cloud Key and NVR in one nice little package that’s PoE powered!

Now, the other version is what I would call the Normal Cloud Key. If you do not need an NVR, this is what you would use. It is smaller, has the same feel and look. Even, has the little display with “at-a-glance system details” along with being PoE powered.  But, does not come with any option to add a hard drive(if you later want to use UniFi Protect). It does have a micro-SD card slot(just like the 1st gen) to store logs, etc…

Would you upgrade to Gen 2 Plus?

Well, if you’re constantly looking at your NVR footage–because you’re bored, sure. However, you will be running the UniFi Protect version and not the older Video 3 applications(server/mobile). Currently, Protect is not 100% feature rich or in-line(yet) with what everything Video 3 had and did do. I hear that’s coming!

If you don’t mind spending a few hours reading all the forum posts about UniFi Protect and are OK with a few things not available yet. Go for it. It’s a nice speed boost, smaller and PoE powered. You will like.

“One App to rule them all, One App to find them…”

So, yeah, that sounds like a good title to this post.  I was thinking, I should reboot the UBNT Security Gateway. I wonder if the iOS app can do that?  And, guess what, yes—it can.  I went to the app, saw my online Cloud Keys…

IMG_3044

I selected the site with the Device I wanted to restart, selected the Device(the screen shot of the devices was taken after I restarted it–that’s why it shows disconnected). You scroll down to the bottom, you’ll see an Actions section and you select “Restart”. Simple.

During the restart time, you’ll see the following:

IMG_3041

The restart didn’t take long and everything showed green in the app within a minute or so. I haven’t played too much with the app, other than just viewing some basic info. I think Scott McDermott did a full install, update and configure using only the App.  And, from what I see and hear regarding the App, it looks to be a really solid way of managing your UBNT devices.

Game over man, game over!

So I’m at work, doing that work stuff and I get a message:

“I haven’t been able to join games…”

That’s the abridged version of what I actually got, basically the Xbox One’s in the office had been showing a Moderate NAT setting.  And, yes, we have a couple of Xbox One’s in our office, so what, don’t you? And this Moderate NAT setting was causing some game party and chat issues. Hmm.

Now, here’s my journey of enabling UPnP support on the UBNT USG-Pro4 and my thoughts behind this. I thought I would need to create the dreaded config.gateway.json file. Not a big fan of this. As the current syntax can cause some issues if you do not get it perfect. Yes, this is a little down part on the UBNT’s side. However, I think they know about this issue and are working hard to make this easier and better for people to configure. So here’s what I had to do and how I did it.

Now I found there is another file, one called config.properties and in this file you have some settings that are set for enabled or disabled. And, this file is much easier to create and modify. Cool.

So I used WinSCP to connect to the Cloud Key, logged in with the username/password you created when you setup the Cloud Key. And then browsed to the location of my “Site“.

Finding the Site consists of two parts, finding the “base” location of where files are stored, this is different depending on what Operating System the Controller is running on. Then finding the site. Once you have the location, just create a text file called: config.properties and add the following line: config.igd.enabled=true

Save and Done.

OK, now you need to Provision the USG. This part was a little confusing as I was looking for a “re-provision” button to click. I didn’t see one. So I created a port forward on the USG, which appeared to provision the USG again, i.e. update with new settings. Hmm. For some reason that appeared to not work? Or I just didn’t wait long enough for settings to be effected. So I just told the USG to reboot.  And, that worked.

So my thoughts on this process are, it was simple–yes. It could be better–very better! Why are these settings not in the Controller GUI? I understand for the settings that have a little more than Enabled or Disabled option to not be shown(for now). But, for settings that are a yes or no, those should all be listed. So this wasn’t a complete game over, but I had to reload my weapon.

You have the Key and the Cloud!

One of things that I was really curious about and really like about UBNT, is the Cloud Key.

So I asked around to a couple of folks that have UBNT, they mostly have Access Points, and asked how they are managed. I got two different responses:

  1. I only have two APs, so I run the “Controller” on my laptop.
  2. I run the “Controller” in Docker on my Synology.

Options. You have options! Now, this is cool. The Controller software is what you’ll need to manage, configure and update the UniFi line of products(and I hear it works for some of their other stuff too). Now this Controller piece can be installed on Mac, Windows and Debian/Ubuntu Linux.  And all of those options can be virtualize with whatever flavor of hypervisor you like. Nice.

BUT, with Cloud Key, you just plug the little PoE unit in, wait a few seconds for it to boot and you’re pretty much done, well maybe not just yet. I’ll explain…

It does have a mini-USB port for external power(for use with non-PoE switches) and has a micro-SD slot. I’m a huge fan of anything PoE, lights, temperature sensors, you name it, so this thing hit the spot!

Setup is pretty quick and easy, here’s what I did, USGPro4 connected to the Switch and the Cloud Key is connected to the Switch. I had powered on the USG and Switch prior to connecting the Cloud Key. I had the USGPro4 powered on for 10+ minutes prior to connecting the WAN link–for some reason, on the WAN side, it didn’t pull DHCP until I rebooted. Odd? There was a firmware update for the USG–maybe that resolve the issue, not sure? I need to check that again.

So on to the setup. I use Chrome and UBNT has a plugin for seeing devices and “Adopting” them. Just visit unifi.ubnt.com create your account and login. You’ll then be prompted to install the Plugin and that part done. Simple. Easy. Refreshing.

IMG_2774

You’ll then see the Cloud Key, select the “Adopt” option. (yes, I know these images are blurry and hard to read–I took pictures of the screen I was using for the setup)

Oh wait, an update is available, yeah do it!

And, it reboots…

IMG_2780

Once this process is done and everything is updated you’ll notice a few changes on the Cloud Key. First, the white light should now be Blue, and that’s what you want, it means Adoption is correctly done and everything is working well.

And, this part is almost done. Login in via unifi.ubnt.com, you’ll see the Cloud Key listed, you’ll click on it and see the following:

IMG_2787

Make sure “Launch using Cloud” is selected, you have two other options and one is using your own domain. That part seems interesting, maybe a “custom branding” option is down the road, you know, for your own color scheme on the interface along with a custom logo??

And, we are done, that was simple, the Controller software is on the Cloud Key. Even though it’s local, on your network, everything can be accessed remotely. Nice.

Now, the only thing I’d like to know is—can multiple Keys be used to form a High Availability setup?

Wait, what if I don’t want to run the Cloud Key or have the Controller running someplace? Then you need Unifi Elite. This is a hosted Controller along with phone support and extended device warranties.

A new lighthouse, shows the way.

Spent a little more time on Twitter digging through weeks of past tweets and came across this:

Which sounds awesome, because the LED not aligning on the USG or Switch(whichever way you look at it) was bugging me. Yeah, I know, tiny little details. But c’mon this is odd looking.

IMG_2800

Which brings me to my next odd encounter. The Port Forwarding and Firewall settings. This is where it was little confusing, I kept looking under the Firewall page for Port Forwarding settings. Nope. They’re actually(for now?) under the Device settings, you select the device, which brings up Details about that device. Then you select Configuration and there it is, Port Forwarding.

Once you create a Port Forward, they do show under the “Settings -> Routing & Firewall” settings. But, you can not make changes to that Port Forward setting, you need go back to the Device page, select the device…you get the idea.

So after a little more reading, I ran into another odd thing, the “config.gateway.json” file. Not sure how odd this is to people who’ve been using that customized method. However, I came across this:

This may take some patience because if you get the formatting wrong you’ll trigger a boot loop on the USG.”

Wow… uhm .. so I have the option, to lets say brick my USG, interesting! This leads me into another thing I saw(I’m still trying to find where I read it) but if I remember correctly. UBNT knows this is an issue, so they hired Chris Buechler of pfSense to make this better. I think someone else made a comment to Chris about this and his response was(something along this line) “Yeah, I’m here to make that better”.  So this could be why the “Routing & Firewall” options have the label Beta next to it.

The adventure road, has a little gravel…

So far here’s what I don’t like about UBNT and the little things that bug me.  First lets show a little love to the USG PRO-4. Much smaller than I thought, BUT the power cable. Using that damn, what I call mouse ears power cable. I’m not sure what the technical reason behind this is, however, how many people have that type of cable laying around Maybe that could be changed? Not a show stopper. (The USG does come with the cable needed).

Now about this Cloud Key cable, odd, but kinda cool looking. I dug around on Twitter and Instagram looking for what other people did. And, they just plugged it in and left the Key hanging off a switch port. Hmm. I’m not a big fan of that. The cable is thick and can stay in a bent shape. Which would keep it a little out of way. I ended up using a two foot Belkin CAT-6 and placed it on top the Switch. Maybe they could have an accessory that would mount into a 1U space that would hold the Cloud Key. Otherwise, some double-sided velcro is in the device’s future.

Now for this part, I’m sure nobody cares, however, that was the first thing I noticed when I placed the units on top of each other. Where the device name and square logo light is at. I think that should all be in the exact same spot so when the products are stacked up, it looks nicer. As for the LED color looking like a different shade of blue, I’m pretty sure it was just the angle of the picture. I don’t remember those being different blue shades.  I did like how the LED is white until the device is “Adopted“, then it becomes blue.

IMG_2800

Our walls need APs, right?

So I wanted to do a quick little physical comparison between two wall-plate style Access Points. I think this market is pretty open, maybe not so much for greenfield projects, but this fits in a nice place for the brownfield folks.  Lots and lots of hotels need wireless access. And I think cost is a huge factor. If you have people paying $50 to $600 a night for a room you want excellent wireless connectivity. That might be hard for the hotels/motels that have been around for 30+ years. Hence why I think wall-plate APs are a very good fit. And, it goes well with “don’t put the APs in the hallways” chant.

So I have an AP from two different folks, one from UBNT: AC IN-WALL and the Cisco Meraki MR30H. (I think the MR30H sounds like MR38, should be renamed to MRH30)

Now this is just a physical comparison, nothing about performance, setup etc… or any other metrics have been done yet. I just wanted to show what they look like and because I think these units fit two different needs, and I’ll explain that thought a little down the road.

Alright, picture time. (UBNT is the smaller of the two)

They are roughly about the same size, however the MR30H is much heavier. If you tossed it in your backpack–you’d know.

For thickness they are roughly the same. One thing that is interesting about the UBNT is how it mounts. The AP is actually inside a plastic mounting “case”. You can see the little plastic push part at the top that you press to remove the top half cover. The back half is then mounted to your wall or junction box, or whatever. The AP has a couple screws to secure it to the back cover, then the front cover snaps on. It’s actually pretty difficult to pop off, a few times I thought it was going to break by the amount of force I was using on it. I would say it’s pretty secure–but if you are determined to get into it, well whatever, you’ll get into it.

The MR30H has a metal bracket that is mounted, then the AP connects to that, you have to use a special tool to release a little bracket, then the AP tilts off the bracket. I think this is a little harder to remove, because you need a specialized tool.  But you’ll need a screwdriver to remove the UBNT unit from the back cover too.  So bottom line is—for maintenance, a tool is needed. Not really a big deal.

And here is the UBNT unit…

And as for what comes in the box, MR30H has more, typical foam/sponge(Meraki does this with other products) that holds all the little screws etc, normal docs and mounting plate.

The UBNT is very minimal also, tiny little bag of a few screws and a little folded install, setup guide.

I mentioned early, I think these fit two different areas. On one hand, you could install a couple UBNT vs. one MR30H. What does that mean? Well, it’s the price. List price on UBNT is just under 100 US Dollars and the other is around 400.  Now, the MR30H does have four network ports. Personally I can’t remember the last time in five years I plugged into a hotel network port. But then again, my hotel stays have been in large metro areas. Good thing they do have networks ports though, as I always see some type of IP phone in the hotel room. Lets say one CAT cable is ran, you then have an AP and IP telephony. Cool.

Also, one requires a “cloud license” and the other a “controller” of some type.  If you’re reading this blog, then you know how one operates. But, the other can do local, cloud, or a hybrid controller. I think UBNT is fitting the perfect need of the smaller hotel/motel. As you know you need wireless access, but how? And, budget is a huge deal. Maybe you only have 75 or less rooms? If your facility is older, you probably have cinder block walls which equals nice attenuation. So you do one AP per room, drop the power or do whatever(but seriously though, do a predictive model–if you can).

So basically this is it, you just became a little more familiar on some wall-plate Access Points.