One of things that I was really curious about and really like about UBNT, is the Cloud Key.


So I asked around to a couple of folks that have UBNT, they mostly have Access Points, and asked how they are managed. I got two different responses:
- I only have two APs, so I run the “Controller” on my laptop.
- I run the “Controller” in Docker on my Synology.
Options. You have options! Now, this is cool. The Controller software is what you’ll need to manage, configure and update the UniFi line of products(and I hear it works for some of their other stuff too). Now this Controller piece can be installed on Mac, Windows and Debian/Ubuntu Linux. And all of those options can be virtualize with whatever flavor of hypervisor you like. Nice.
BUT, with Cloud Key, you just plug the little PoE unit in, wait a few seconds for it to boot and you’re pretty much done, well maybe not just yet. I’ll explain…


It does have a mini-USB port for external power(for use with non-PoE switches) and has a micro-SD slot. I’m a huge fan of anything PoE, lights, temperature sensors, you name it, so this thing hit the spot!
Setup is pretty quick and easy, here’s what I did, USGPro4 connected to the Switch and the Cloud Key is connected to the Switch. I had powered on the USG and Switch prior to connecting the Cloud Key. I had the USGPro4 powered on for 10+ minutes prior to connecting the WAN link–for some reason, on the WAN side, it didn’t pull DHCP until I rebooted. Odd? There was a firmware update for the USG–maybe that resolve the issue, not sure? I need to check that again.
So on to the setup. I use Chrome and UBNT has a plugin for seeing devices and “Adopting” them. Just visit unifi.ubnt.com create your account and login. You’ll then be prompted to install the Plugin and that part done. Simple. Easy. Refreshing.

You’ll then see the Cloud Key, select the “Adopt” option. (yes, I know these images are blurry and hard to read–I took pictures of the screen I was using for the setup)


Oh wait, an update is available, yeah do it!


And, it reboots…

Once this process is done and everything is updated you’ll notice a few changes on the Cloud Key. First, the white light should now be Blue, and that’s what you want, it means Adoption is correctly done and everything is working well.


And, this part is almost done. Login in via unifi.ubnt.com, you’ll see the Cloud Key listed, you’ll click on it and see the following:
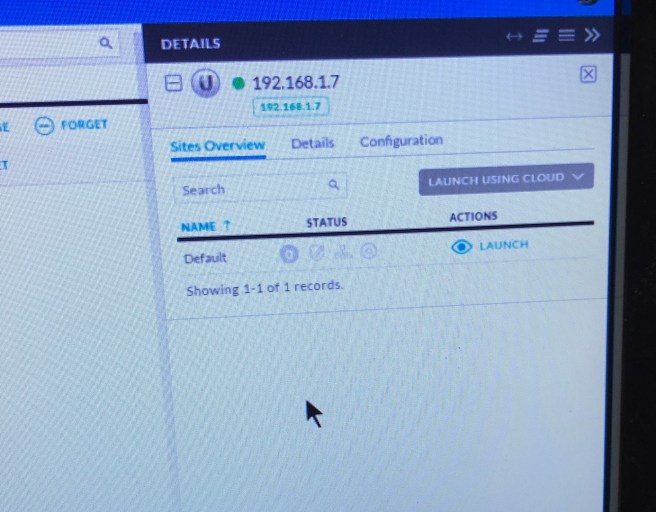
Make sure “Launch using Cloud” is selected, you have two other options and one is using your own domain. That part seems interesting, maybe a “custom branding” option is down the road, you know, for your own color scheme on the interface along with a custom logo??
And, we are done, that was simple, the Controller software is on the Cloud Key. Even though it’s local, on your network, everything can be accessed remotely. Nice.
Now, the only thing I’d like to know is—can multiple Keys be used to form a High Availability setup?
Wait, what if I don’t want to run the Cloud Key or have the Controller running someplace? Then you need Unifi Elite. This is a hosted Controller along with phone support and extended device warranties.
